
Introduction
Developing EveryMundo’s latest feature in the airTRFX Control Platform wasn’t easy. It involved a lot of strategic planning, research, coding iterations, and time. As a developer, building a successful product feature with high visibility can be nerve-wracking—so how did we bring the airTRFX Maximization Score to life? Go from 0-100 with our airTRFX Maximization Score!
1. The Planning Phase
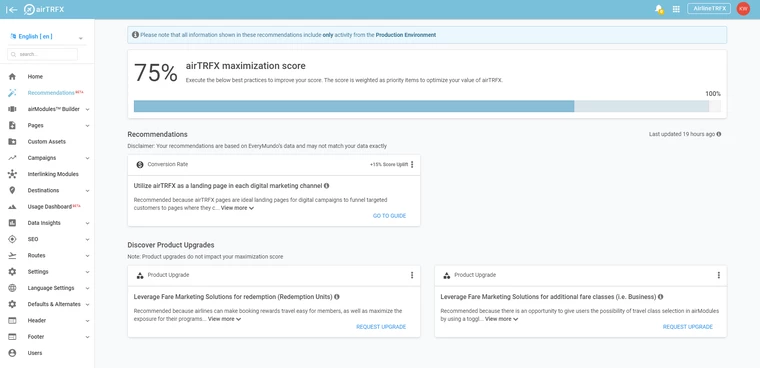
What is the airTRFX Maximization Score? As the name suggests, the Maximization Score offers users a score ranging from 0-100%. This overall score indicator offers users an estimate of how well their accounts are performing. Users get recommendations on ways to enhance their accounts to maximize the benefits of their airTRFX Products. Users can increase their overall score by accomplishing recommended tasks associated with an uplift score. These recommendation cards are tailored to the user and can be freely dismissed by them if they are not relevant.
During the planning phase, we encountered questions about the purpose of creating the Maximization Score and how to measure success for this feature. This phase demanded extensive research and analysis to determine the viability of the feature. For instance, in assessing the performance of the Maximization Score, we take into account the following Key Performance Indicators (KPIs):
- Amount of recommendations applied per user
- Amount of recommendations archived per user
- Amount of product upgrade requests
- Amount of non-applicable product upgrades
At its core, the Maximization Score offers users an overview of their accounts and optimization strategies to generate the most value from their airTRFX products.
2. The Development Phase
Once we listed the technical requirements in the planning phase, we began development. The Maximization Score is structured for release in multiple development phases: the initial development phase, the recommendation cards, and the progress bar.
The following tech stacks were used to implement the following components: AngularJS (now Angular 9), Node.js, JavaScript, MongoDB, and AWS serverless.
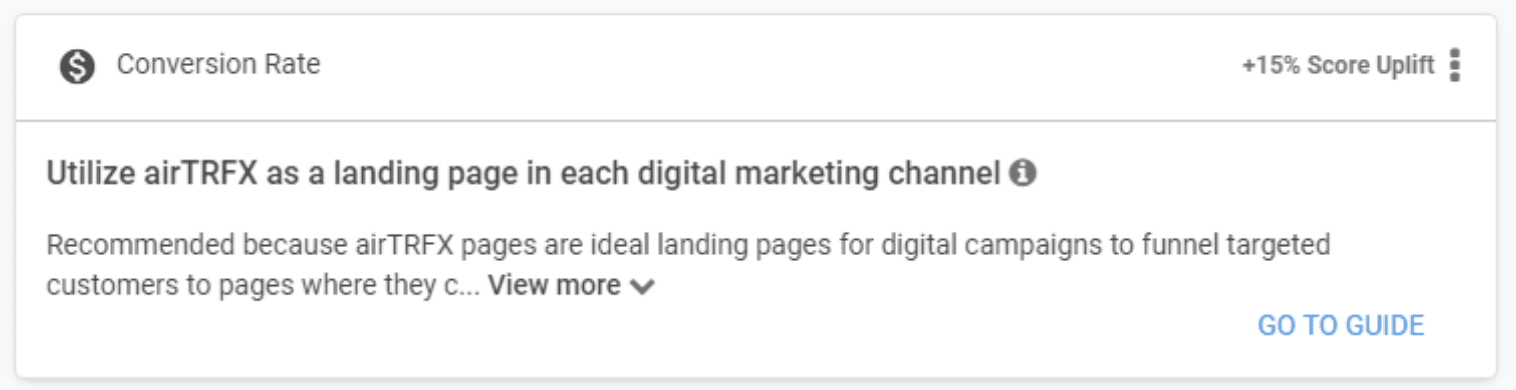
Let’s examine a recommendation card. We can see that the card comprises a title, a description, an impact category (conversion rate), a score uplift, and a link. We also understand that there will be various recommendations that may vary for each user.
Here is where we decide where we want to store our data. Because of its ease of use, scalability, and flexibility, we opted for MongoDB over a traditional RDBMS. Since each card includes multiple parts, we establish an initial schema that includes the following fields:
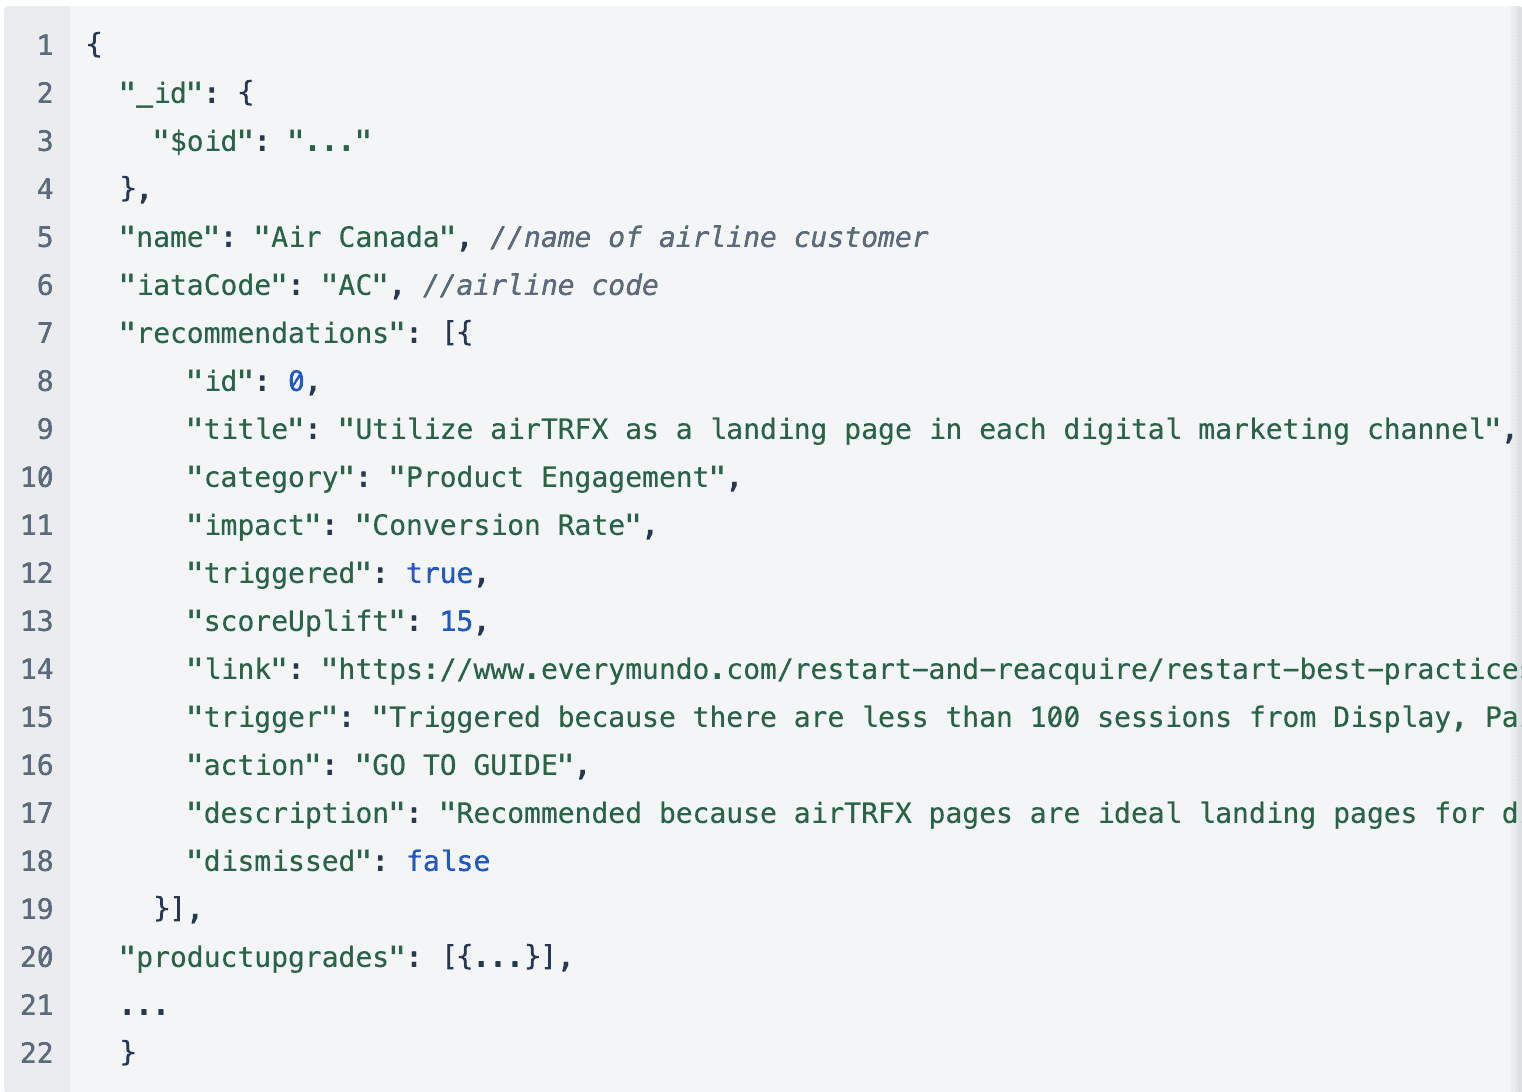
The schema mentioned above provides an example for Air Canada, with fields relevant to the previously displayed recommendation card.
Now that we have defined the schema, how do we decide when to recommend a card?
2.1 Implementation
Since the Maximization Score will be located in Everymundo’s airTRFX Control platform, we need to create a service that can be easily integrated into that platform. This is where Serverless Computing becomes essential. In our case, we will utilize AWS Lambda to deploy our code. This approach reduces latency, eliminates the need for server management, and offers inherent scalability.
To determine how and when to recommend a card, we collect data from various sources, including Google Analytics. Using the example recommendation card provided earlier, we can observe that the schema defines the trigger as follows: “Triggered because there are fewer than 100 sessions from Display, Paid Search, Email, and/or Social to airTRFX template and/or custom pages in the last 30 days.”
This means that we should only recommend this card to the user if their session data in Google Analytics indicates fewer than 100 sessions. To query these results, we will have to create a function within our serverless project that utilizes the Google Analytics API.
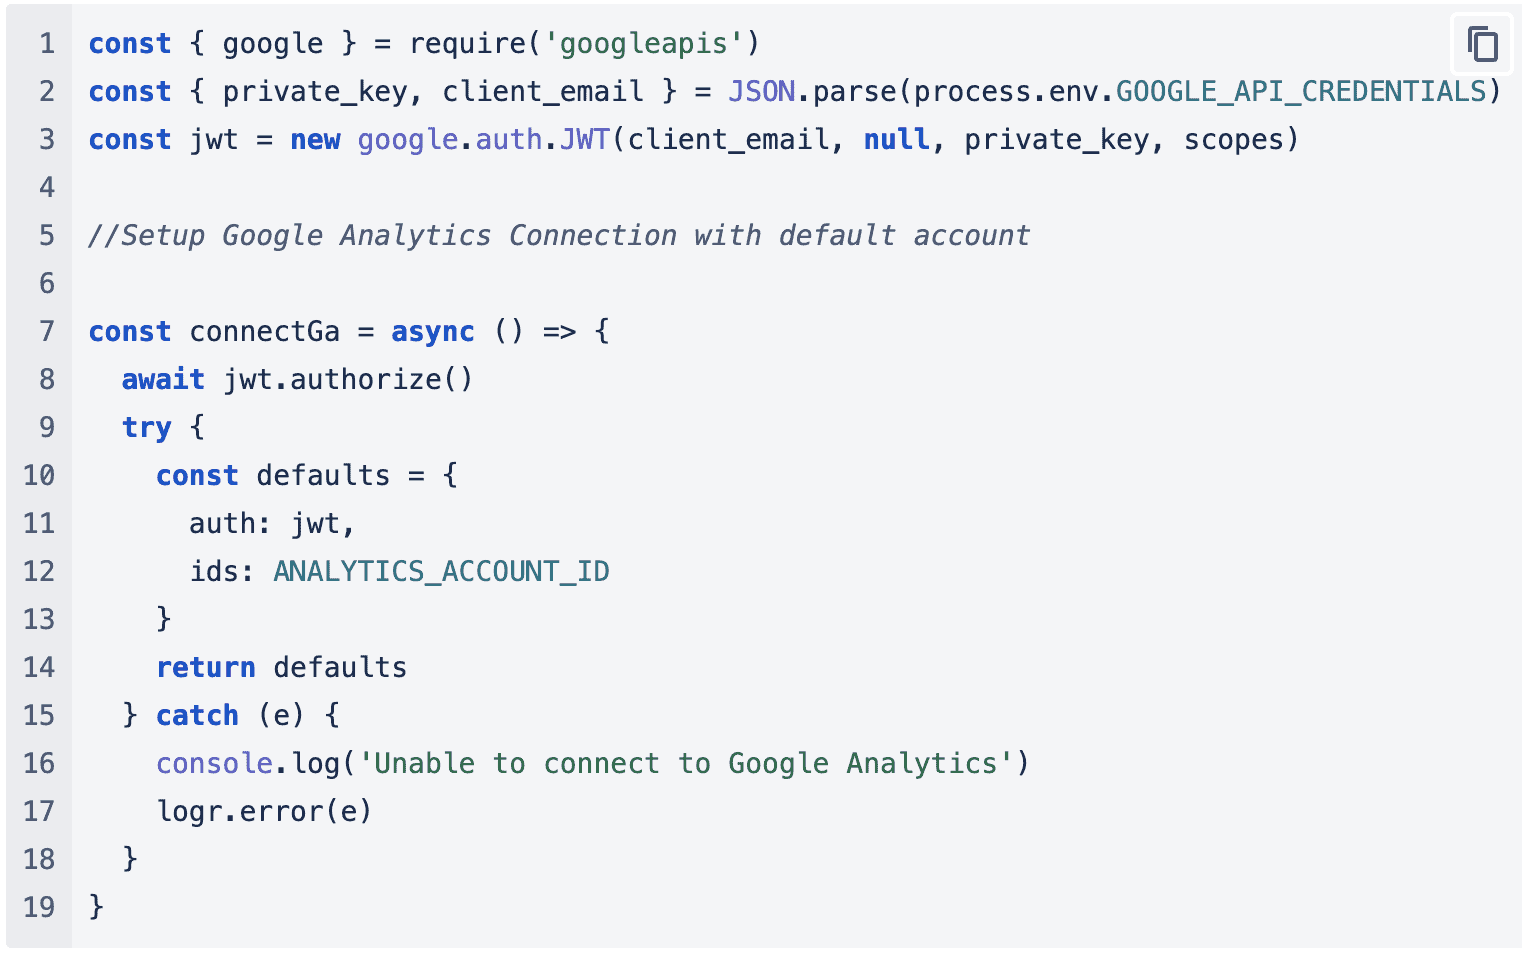
Once we add the Google Analytics API requirements to the project, we will have to query the API to collect the results for the trigger:
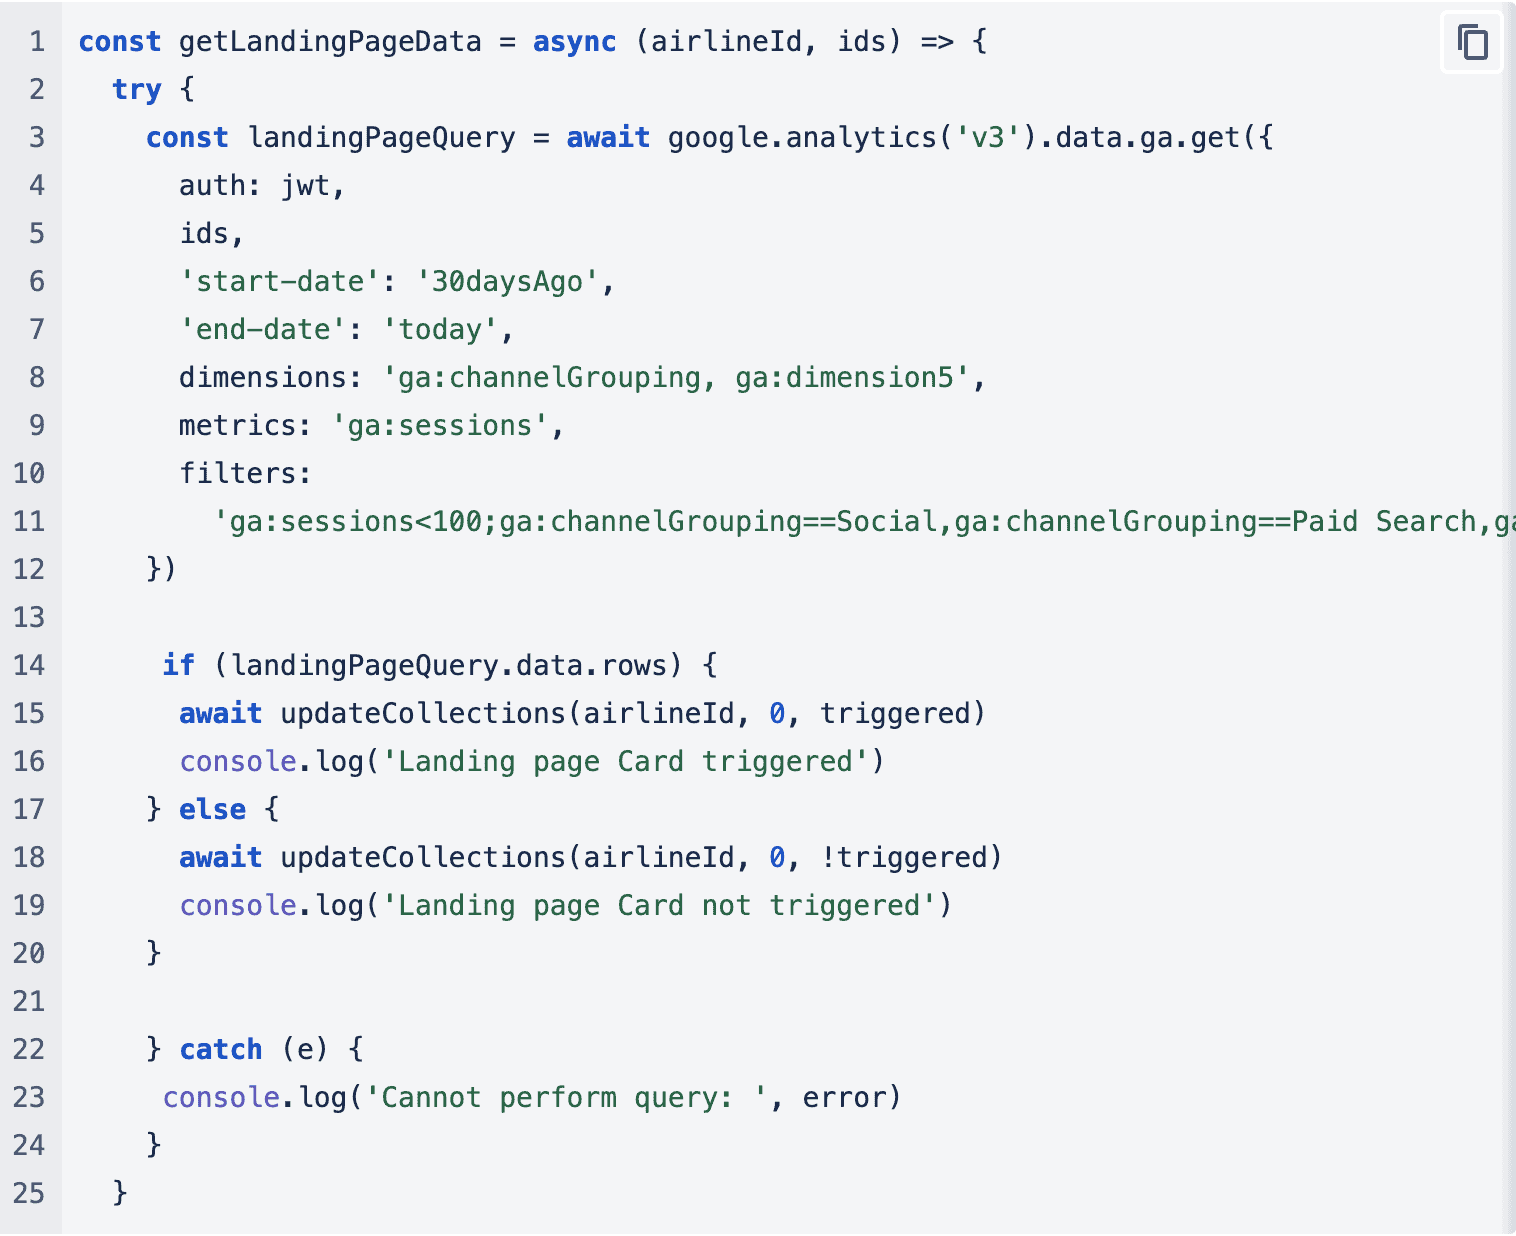
This function accepts an airline, which is defined as the IATA code in our MongoDB schema, and IDs, representing the Google Analytics account IDs. In the filters section, we specify the criteria for the trigger: we want to see fewer than 100 sessions from Display, Paid Search, Email, or Social Channels.
Referring to the MongoDB schema, there is a field called “triggered.” This field is a boolean value that is toggled based on the query results. In other words, if data is received from the Google Analytics query, this field will be set to true. Essentially, we want “triggered: true” only if our query results are not empty. To update our MongoDB document accordingly, we invoke a function to update this field in line 15: updateCollections().
2.2 Update Collections
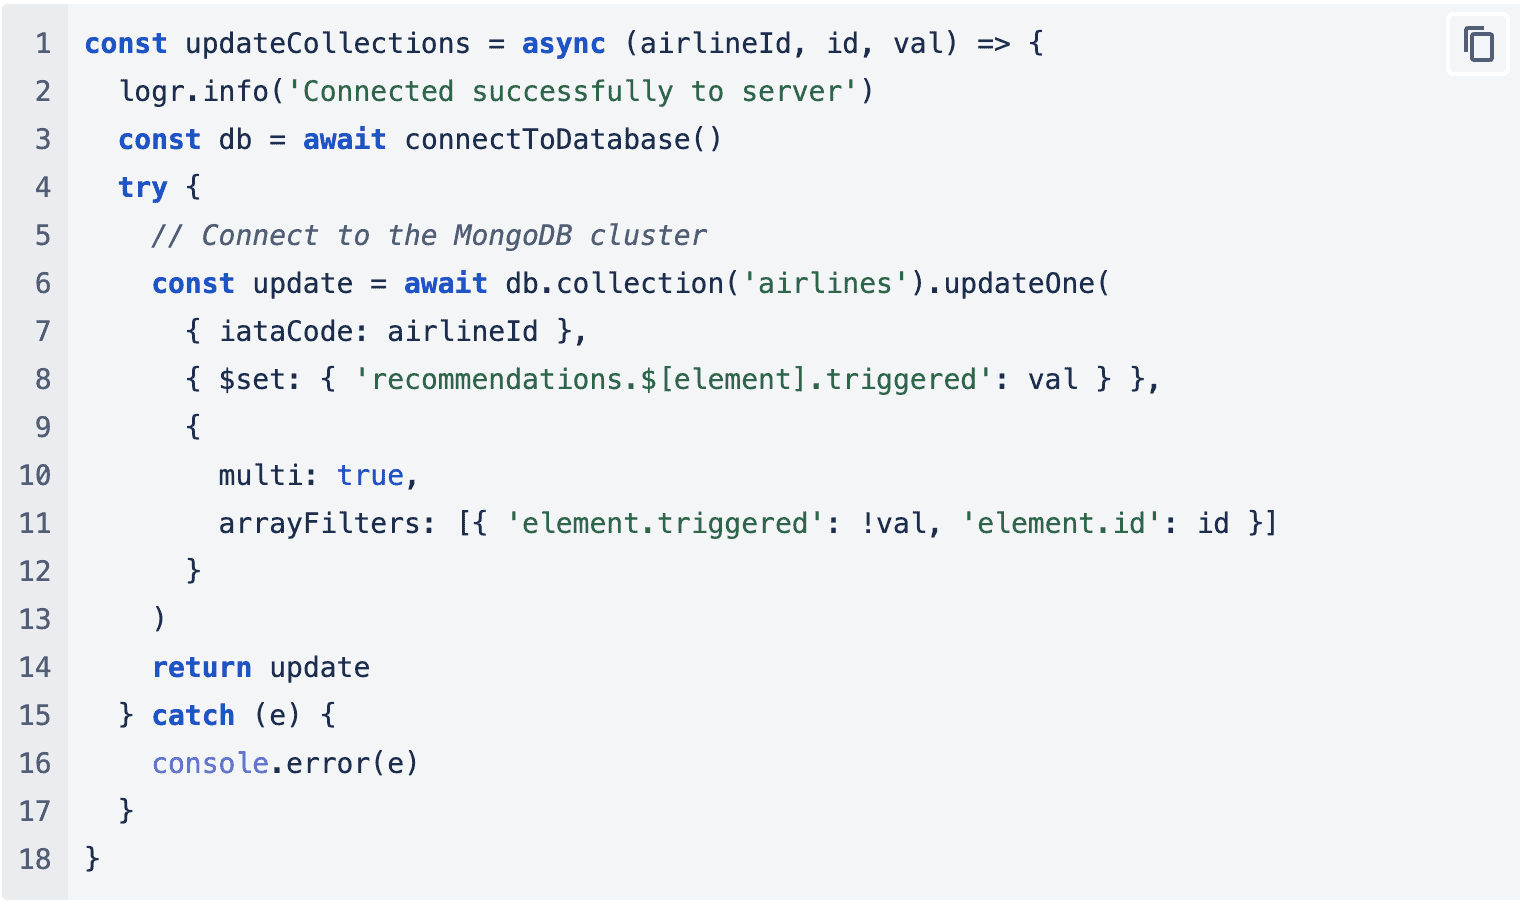
The data flow is as follows: we define the MongoDB schema, then we create a serverless project, import the necessary packages/APIs, and create a query function.
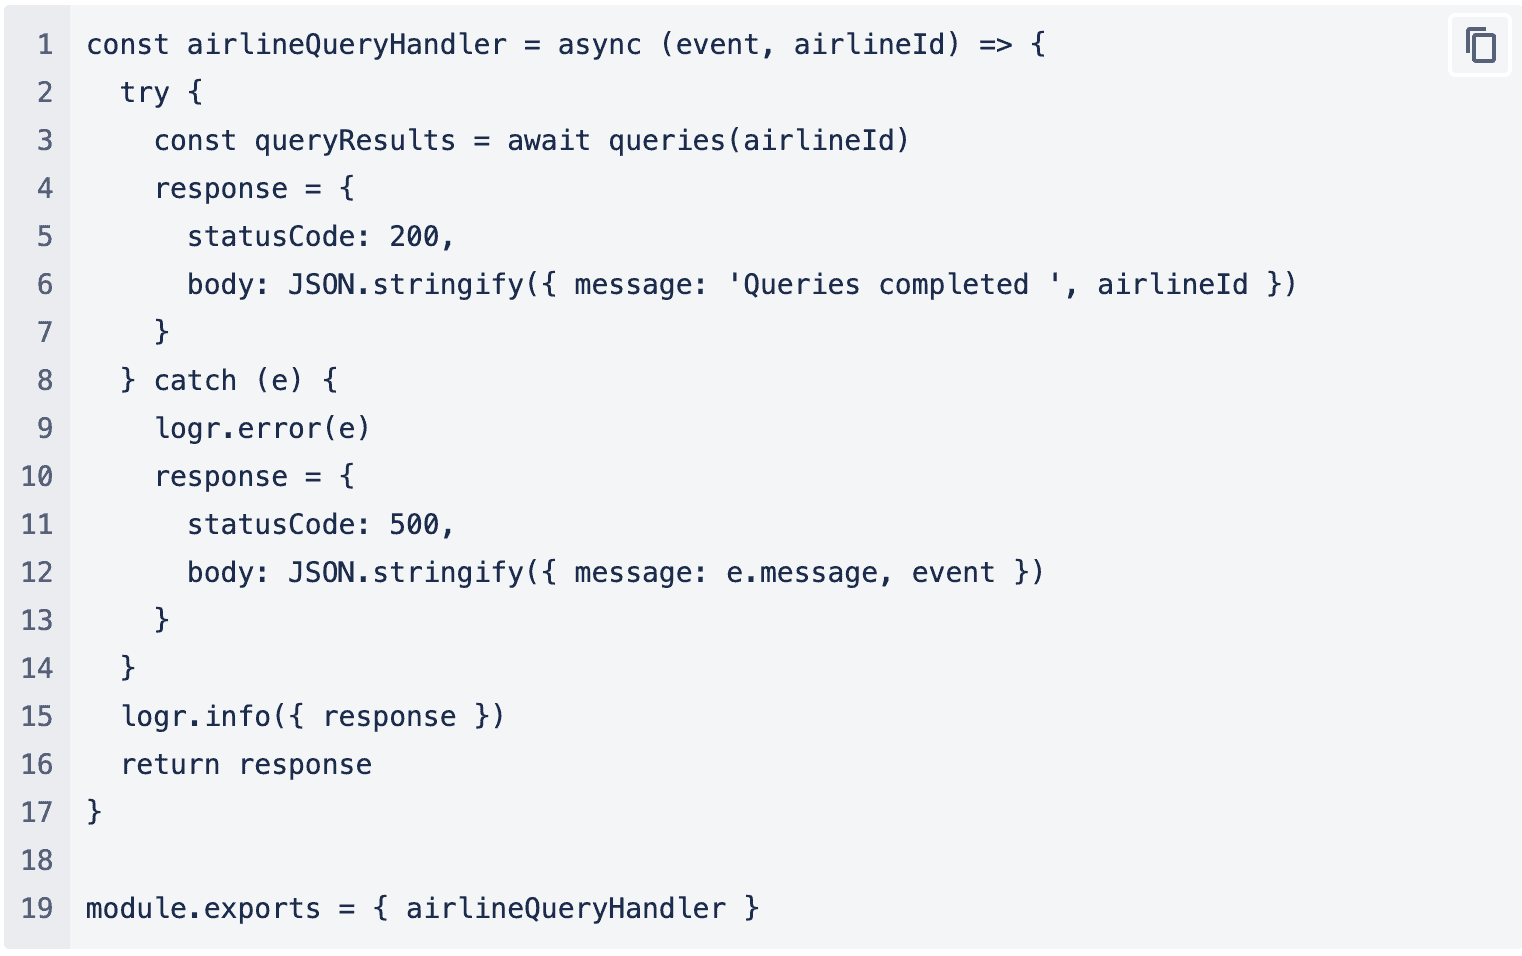
Lastly, we generate a handler that exports our queries to AWS Lambda. In the handler, we invoke the query function and transmit the response to AWS. As an example:
Once we export and define the handler in the serverless.yml file, we can deploy it to the AWS Lambda service. If the deployment is successful, you can locate the functions under the functions tab in AWS Lambda.
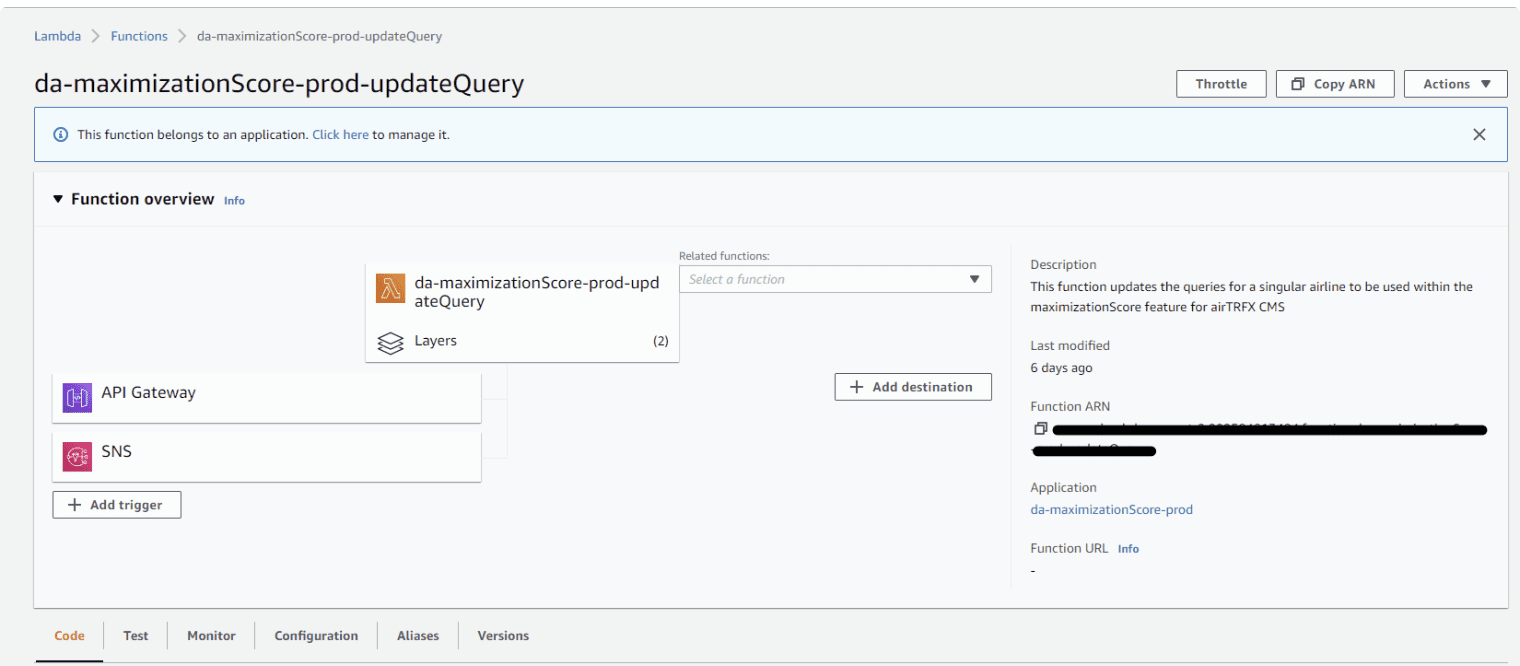
Because we use this lambda in the airTRFX CMS, we have established endpoints for our lambda functions. To display the data on the front end, we aim to access the resulting MongoDB document for each user. As a result, we specify a GET request in the serverless.yml file. AWS Lambda generates an API URL endpoint that our frontend application can utilize.
2.3 airTRFX CMS
After we import the endpoints into the airTRFX CMS, we can now incorporate them throughout our application. To establish the foundation for the card component, we employ HTML/CSS and a component.js file. As previously mentioned, the card component comprises multiple parts. Utilizing Angular templating concepts, we leverage our endpoint data by creating bindings and interpolating those values within our HTML. Given that there are multiple cards, we iterate over our endpoint data using ng-repeat or *ngFor (in Angular) for each index. In our component file, we define an OnInit method to populate our page with endpoint data upon initialization. This helps us avoid redundant code and ensures faster page loading. To guarantee that our feature loads only once we receive the endpoint data, we can utilize resolvers in Angular. Resolvers are defined in the feature’s state configuration files.
We have now completed the foundation of the Maximization Score feature.
3. Release
Once we complete the planning and development phase, it’s time to launch the Maximization Score. During the development phase, we went through multiple iterations, which is a common practice when creating features from scratch. In this phase, we have implemented all the necessary components to support the feature. We have designed the user interface, built the feature, and conducted thorough testing. We released the Maximization Score Beta to the public on May 5th. Customer feedback plays a crucial role in this phase because ongoing development is necessary to continually enhance the Maximization Score.